Ever thought you could get pro visual results without spending hours on complex software? Many creators feel stuck by the steep learning curve of industry-standard tools. Yet, they still want top-notch production value for their projects.
You don’t need expensive subscriptions or complicated timelines to boost your content. Modern, easy-to-use alternatives can simplify your workflow. This lets you focus on your creative vision.
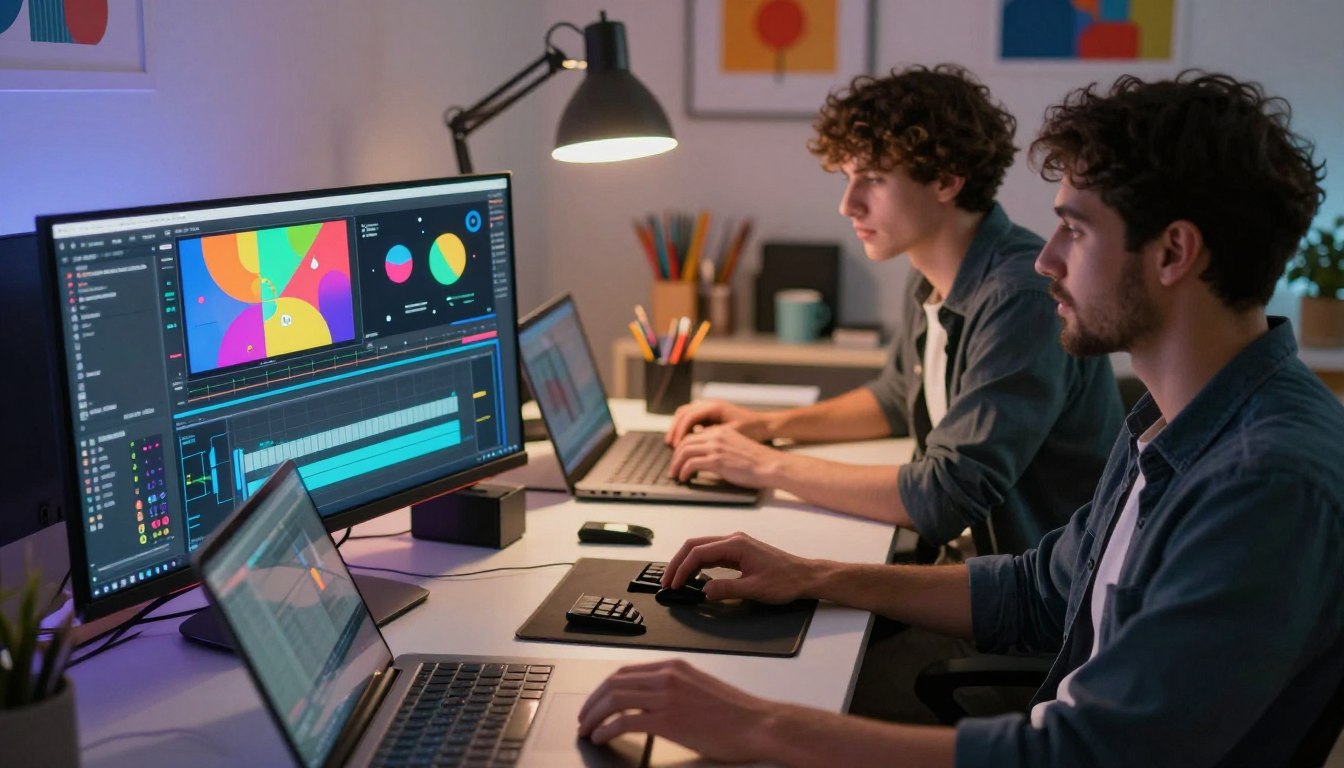
This guide shows how to add professional-grade overlays easily. Whether you’re enhancing an ai porn pmv motion graphics sequence or adding flair to a video, these tips save time. Learn how to get sophisticated results that grab your audience’s attention right away.
Key Takeaways
- Learn to produce high-quality visual effects using simplified software alternatives.
- Master efficient workflows that prioritize speed without sacrificing professional quality.
- Understand how to integrate overlays seamlessly into your existing video projects.
- Discover tools that eliminate the need for complex, time-consuming rendering processes.
- Enhance your overall production value to keep your audience engaged and impressed.
Understanding the Workflow for AI Porn PMV Motion Graphics
Getting good at ai porn pmv motion graphics means knowing what you want to create. Focus on making visuals that grab attention and are simple to follow. A clear plan helps each part of your video work together well.
Defining the aesthetic requirements for PMV projects
A great project balances its base footage with motion elements. Make sure your overlays add meaningful information without overwhelming the screen. Keeping a consistent style and color helps your video look professional from start to finish.
Why After Effects is not the only path to professional results
Many think only complex software can lead to top-notch visuals. But, you can make amazing ai porn pmv motion graphics with easier tools. Today’s non-linear editors have strong compositing tools for rapid iteration and quality results, without needing to learn complex animation software.
Setting up your workspace for efficient editing
Organizing your digital space is key to faster editing. Set up a clear folder system for your assets before starting your project. This keeps your ai porn pmv motion graphics workflow smooth and free from tech issues.
Selecting the Right Video Editing Software Alternatives
Finding the right video editor is crucial for your work. Many creators stick to what they know, but new options offer great flexibility for pmv motion graphics. Choose a tool that fits your needs for the best results.
Leveraging DaVinci Resolve for node-based compositing
DaVinci Resolve is great for detailed control over visuals. Its node-based compositing lets you create complex visual chains. This is helpful for precise color work and intricate masks.
Nodes make it easy to add effects without messing up your timeline. This keeps your pmv motion graphics organized and easy to tweak. It’s a smart way to manage complex visuals.
Using CapCut for rapid mobile-style overlay application
CapCut is fast and easy to use for quick edits. It lets you add trendy overlays quickly, perfect for creators on the move. Its design encourages fast work, keeping you creative.
Many use mobile apps like CapCut with desktop tools for faster work. This mix helps create new assets quickly and integrate them smoothly. It keeps your content fresh and modern.
Exploring Adobe Premiere Pro for traditional timeline editing
Adobe Premiere Pro is loved for its easy timeline interface. It’s great for big projects needing precise audio and video syncing. You can manage your pmv motion graphics alongside your main footage, ensuring perfect timing.
The software also has many plugins for extra features without a big learning curve. Mastering Premiere Pro lets you make high-quality videos with consistent pacing. It’s a solid choice for those who like a structured workflow.
Sourcing High-Quality Overlay Packs and Assets
Starting a library of top-notch assets means knowing where to find them. A great overlay pack can make your project look professional. It keeps your workflow smooth and your final product cohesive.
Identifying reputable marketplaces for motion graphics
Look for platforms with high-resolution assets and clear licensing. Many creators use well-known marketplaces for a versatile overlay pack. Here are some top places to check out:
- Envato Elements: Offers a huge library with a subscription model.
- Motion Array: Provides top-notch templates and plugins for major editors.
- Artgrid/Artlist: Great for cinematic assets that need little tweaking.
Evaluating file formats like MOV, MP4, and Alpha channels
Knowing your file formats is key for smooth integration. MP4s are common but lack transparency for complex layers. Files with Alpha channels let you layer graphics easily without background removal.
“The secret to a clean composite lies in the quality of your source files and the precision of your technical setup.”
| Format | Transparency | Best Use Case |
|---|---|---|
| MOV (ProRes) | Yes (Alpha) | High-end compositing |
| MP4 (H.264) | No | Standard blending modes |
| Green Screen | Via Keying | Customizable backgrounds |
Customizing stock assets to fit your specific theme
You can change a standard overlay pack to fit your theme. Try different blending modes and speed settings for unique looks. It’s like making it your own.
When using green screen assets, keep those green backgrounds. It makes it easy to change colors or textures later. Consistency is key in building your motion graphics library.
Preparing Your Project Files for Seamless Integration
A successful project starts long before you apply your first effect. When you work with pmv motion graphics, the technical foundation of your files is key. It sets the stage for a smooth editing workflow.
Organizing your assets well prevents common errors during the final render. A structured approach saves you hours of troubleshooting later.

Standardizing frame rates and resolutions
Inconsistent frame rates cause stuttering playback. Make sure every asset matches your project timeline settings exactly.
- Set your project to a standard frame rate like 23.976 or 60 fps.
- Convert all imported assets to match this specific rate.
- Keep a uniform resolution, such as 1080p or 4K, to avoid scaling artifacts.
Managing color profiles for consistent visual output
Color shifts can ruin your work’s professional look. You must manage your color profiles to ensure your pmv motion graphics look the same on every device.
Consistency is key for a professional editor. Always check your color space settings before editing.
Using a standard color space like Rec.709 keeps your visuals consistent. This ensures your highlights and shadows stay balanced across different monitors.
Naming conventions for complex overlay libraries
Managing a large library of assets needs a logical system. If you rely on default file names, you’ll lose track of your most valuable resources.
Use a clear and descriptive naming convention to keep your project organized. For example, use “Category_Type_Version” to identify your files quickly.
By following these habits, you create a professional environment for your pmv motion graphics projects. A clean workspace is the ultimate tool for creative efficiency.
Importing and Organizing Your Motion Graphics Assets
Working with a big overlay pack means you need to stay organized. A messy project can waste time and cause stress. By setting up a good system early, you keep everything easy to find when you need it.
Creating a logical folder structure for your project
Begin with a main folder for your project. Inside, make subfolders for different types of assets. Keep raw footage, audio, and your overlay pack in their own places. This keeps things tidy and makes backups simpler.
Being consistent is key. Use the same folder names for all your projects. This makes it easy to find files without searching.
Using bins and tags to categorize your overlay packs
Editing software lets you make virtual bins for your media. Put your overlay pack files in bins based on style, like light leaks or film grain. Color tags help by making different effects easy to spot.
These tools make finding files fast during editing. Instead of searching through many files, just click on a bin. This saves time and keeps you focused on the creative work.
Syncing assets with your primary video timeline
After organizing, make sure your assets match your main video timeline. Use markers for music beats or visual cues. This ensures your overlay pack elements fit perfectly, keeping the viewer interested.
Here’s a table to help pick the best way to organize your work:
| Method | Primary Benefit | Best For |
|---|---|---|
| Folder Hierarchy | File Security | Large Projects |
| Software Bins | Rapid Access | Daily Editing |
| Color Tags | Visual Clarity | Complex Layers |
| Timeline Markers | Perfect Sync | Music-Driven Edits |
Applying Overlays Using Blending Modes and Opacity
Blending modes connect raw clips to polished visual effects. When you add a overlay pack, the settings might not be perfect right away. You need to adjust how these layers mix with your footage for a professional look.
Mastering Screen, Multiply, and Overlay modes
Knowing how these modes work with pixels is key. The Screen mode is great for light effects, making dark pixels brighter. On the other hand, Multiply darkens scenes by blending colors with the background.
The Overlay mode is a mix of both, increasing contrast while keeping highlights and shadows. Playing with these settings lets you fit any overlay pack to your project’s lighting.
Adjusting opacity for subtle visual integration
Opacity is crucial for balancing your composition. If an effect is too strong, lowering its opacity makes it blend better. This keeps your graphics from taking away from the main subject.
Strive for a subtle effect that feels like part of the scene. A small adjustment can make a big difference between amateur and refined production. Always check your edit at full resolution to get the transparency right.
Layering multiple effects for depth and complexity
Stacking different assets from your overlay pack can create a unique look. This adds depth that single-layer edits can’t match. Try mixing a light leak with a dust texture for organic movement.
Managing these layers means paying attention to your timeline order. Place intense effects at the bottom and lighter textures on top. This layered approach adds a professional touch to your work.
| Blending Mode | Primary Function | Best Use Case |
|---|---|---|
| Screen | Brightens pixels | Light leaks and flares |
| Multiply | Darkens pixels | Film grain and shadows |
| Overlay | Increases contrast | Color grading and textures |
| Soft Light | Subtle contrast | Gentle atmospheric effects |
Utilizing Keyframes for Dynamic Motion Control
Keyframes are essential for making your visuals move smoothly. They tell your editing software how to change an element at specific times. This turns static images into dynamic visual experiences that grab the viewer’s attention.
Animating position, scale, and rotation parameters
To animate, you need to change the basic properties of your graphics. Moving the position lets elements slide on the screen. Changing the scale makes them grow or shrink, adding depth. And rotation can spin or tilt them, great for music beats.
Using all three can make your animations look professional. For example, scaling up while rotating can make an overlay enter dramatically. Try different values to match your style.
Smoothing transitions with ease-in and ease-out curves
Without smooth curves, animations can feel stiff. Ease-in and ease-out curves make the motion smooth. This makes it feel natural and polished.
Editing software often has a graph editor for these curves. Adjusting the handles on your keyframes changes the velocity. A smooth curve makes your overlays slide in smoothly, not snap.
Creating custom movement paths for static overlays
You can also make your overlays follow specific paths. This guides the viewer’s eye and highlights important parts of your video. It’s great for showing off subjects or text.
For custom paths, add extra keyframes to adjust the route. Precision is crucial here. Small changes can make a big difference. This way, your overlays become a key part of your video’s look.
Enhancing Visual Impact with Titles and Text Effects
Effective titles can change how people see your work. Adding text to your pmv motion graphics helps guide viewers. It’s important to find a balance between looking good and being clear.
Choosing typography that complements your PMV style
Finding the right font is key to good design. Choose fonts that match your project’s mood. Stick to two fonts to avoid too much clutter.
Legibility is more important than fancy fonts. Use bold fonts or outlines to make text stand out. This makes your titles easy to read on any screen.

Applying drop shadows and glows without heavy plugins
You don’t need expensive software for a polished look. Most editing tools have built-in features for text depth. A small drop shadow can make your text look professional.
Inner or outer glows can also make text stand out. Adjusting blur and opacity in your editor keeps things simple and effective. Simplicity often leads to the best results.
Animating text reveals to match the music beat
Syncing text with music creates a better experience. Use keyframes for simple animations like fades or slides. This keeps viewers engaged and makes your pmv motion graphics feel planned.
Keep animations simple to avoid distractions. A sharp reveal is better than a long animation. Aim for precision to match every word with the music.
| Text Style | Best Use Case | Visual Impact |
|---|---|---|
| Bold Sans-Serif | High-energy beats | Strong and clear |
| Light Serif | Emotional sequences | Elegant and soft |
| Monospaced | Technical overlays | Modern and precise |
Advanced Techniques for Masking and Compositing
Track mattes let you edit your footage with great detail. You can do more than just basic cuts. This way, you get results that look like they were made in a professional studio.
These methods give you full control over how your titles and graphics fit with the video. It’s like having a magic eraser for your video.
Using track mattes to isolate specific areas
Track mattes work like a stencil for your video layers. You can use a black-and-white image or a video clip to show only certain parts of your footage. This is great for focusing on specific subjects or creating special windows for your dynamic motion graphics.
When you apply a matte, the software uses the brightness or alpha channel of the layer. This lets you hide or show parts without complicated keyframes. It’s a smart way to keep your project neat and looking good.
Refining edges for clean composite results
Bad edges can mess up the feel of your edit. To get a professional look, you need to refine the edges. Most editors have tools to smooth out your masks or make the edges blend better.
- Feathering: Softens the transition between the masked area and the background.
- Choking: Shrinks the mask slightly to remove unwanted color fringing.
- Contrast: Sharpens the mask edge for a crisp, defined look.
Combining multiple overlays for unique visual textures
You can make your own style by layering different things. Instead of just one effect, try combining light leaks, dust particles, and stylized titles. This adds a real feel to your work that regular edits don’t have.
Try different blending modes when layering these elements. Consistency is key, so make sure your textures don’t take away from the main video. By balancing these elements well, you create a unique visual experience that catches the eye.
Optimizing Performance for Smooth Playback
You can make your editing work faster with a few easy steps. High-resolution files can slow down your computer, causing problems. Prioritizing system efficiency helps keep your work smooth, even during long sessions.
Generating proxy files for high-resolution assets
Proxy files are smaller versions of your media that play smoothly on any computer. Editing with these files lightens the load on your computer. Then, the software switches back to the high-quality files for the final version.
- Speed: Makes your timeline much faster.
- Compatibility: Lets you work with 4K footage on regular laptops.
- Efficiency: Reduces the chance of crashes when working with many layers.
Clearing cache and managing memory allocation
Editing software builds up temporary files over time. These can slow down your system. Clearing your media cache regularly is crucial for a fast workspace. Also, make sure your software has enough RAM for demanding tasks.
“A clean workspace is the foundation of a professional workflow; never underestimate the power of a cleared cache to resolve unexpected playback issues.”
Using render-in-to-out for real-time previewing
Working with many graphics layers can slow down playback. The render-in-to-out feature helps by pre-calculating these parts. This creates a smooth preview file.
This tool is great for checking if your text or graphics match the music. By rendering specific parts, you get a seamless preview experience. Your project stays organized and ready for the final output.
Exporting Your Final Project with Professional Quality
The final export is your last chance to make sure your project looks great. You need to check that all titles and visual effects are right. This ensures your project stays true to your vision.
Reviewing your settings now can save you from future frustration. You won’t have to re-export later.
Selecting the best codecs for high-fidelity output
Choosing the right codec is key for keeping your motion graphics sharp. For web projects, H.264 is the top choice. It balances quality and compression well.
If you’re working with 4K, H.265 (HEVC) is better. It saves space without losing detail.
Configuring bitrate settings for web-ready video
Bitrate controls your file size and how clear it looks. Variable Bitrate (VBR) is better than constant bitrate. It uses more data for complex scenes and less for simple ones.
Choose a target bitrate that fits your platform’s needs. This ensures your video plays smoothly for viewers.
| Resolution | Codec | Target Bitrate |
|---|---|---|
| 1080p | H.264 | 10-15 Mbps |
| 1440p | H.264 | 20-30 Mbps |
| 4K | H.265 | 40-60 Mbps |
Final quality control checks before rendering
Before rendering, check your timeline carefully. Make sure all titles are in place and no assets are out of frame. Consistency is crucial for a professional look.
Ensure your color profiles and frame rates match your original settings. This keeps your project looking polished.
“Quality is never an accident; it is always the result of high intention, sincere effort, intelligent direction and skillful execution.”
Conclusion
Learning to make motion graphics without After Effects opens up new creative doors. You now have the skills to create stunning ai porn pmv motion graphics. This is thanks to smart software choices and good asset management.
Keeping things consistent is key in your editing work. A clear folder structure and standard project files help you meet professional standards. This lets you focus more on the creative side of your work.
Pay attention to the little things to make your work stand out. Small tweaks in blending modes and color profiles can make a big difference. You can even create complex scenes with tools like DaVinci Resolve or CapCut.
Keep trying new things to grow as an editor. Use these tips in your next project to see your skills improve. We encourage you to share your unique style and keep exploring what you can do with your editing tools.
FAQ
Can you achieve professional results with pmv motion graphics without using Adobe After Effects?
Yes, you can. DaVinci Resolve and Adobe Premiere Pro offer great tools for motion graphics. Focus on your style and organize well. This way, you can make stunning visuals without needing to learn complex software.
What should you look for when choosing a high-quality overlay pack for your project?
Look for MOV files with Alpha channels on sites like Envato Elements or Motion Array. These allow for seamless layering. If you use MP4 files, use Blending Modes to remove black backgrounds.
Which software is best for rapid, mobile-style overlay implementation?
A: CapCut is great for fast, mobile-style overlays. It’s easy to use and perfect for quick, modern looks without complex settings.
How do you ensure your titles and text effects remain readable against busy backgrounds?
Choose the right typography for your style. Use drop shadows and glows to add contrast. This makes text clear without using extra plugins.
Why is syncing titles to the music beat important for your PMV?
Syncing titles to the music makes your video more engaging. Use keyframes to match animations with the music. This makes your text dynamic and emotional.
What is the most effective way to manage performance when using multiple high-resolution overlays?
Use proxy files for high-resolution assets. Clear your cache and use render-in-to-out in Adobe Premiere Pro. This helps preview complex layers smoothly.
How do Blending Modes like Screen and Multiply affect your overlay integration?
A: Blending Modes change how overlays interact with layers. Screen works well for light effects, while Multiply is good for textures. Adjusting opacity fine-tunes the effect for a professional look.
What are the best export settings for maintaining professional quality on web platforms?
Use H.264 or H.265 codecs for high-quality exports on YouTube or Vimeo. Set high bitrate settings for complex graphics. Always check your project’s frame rates and resolutions.