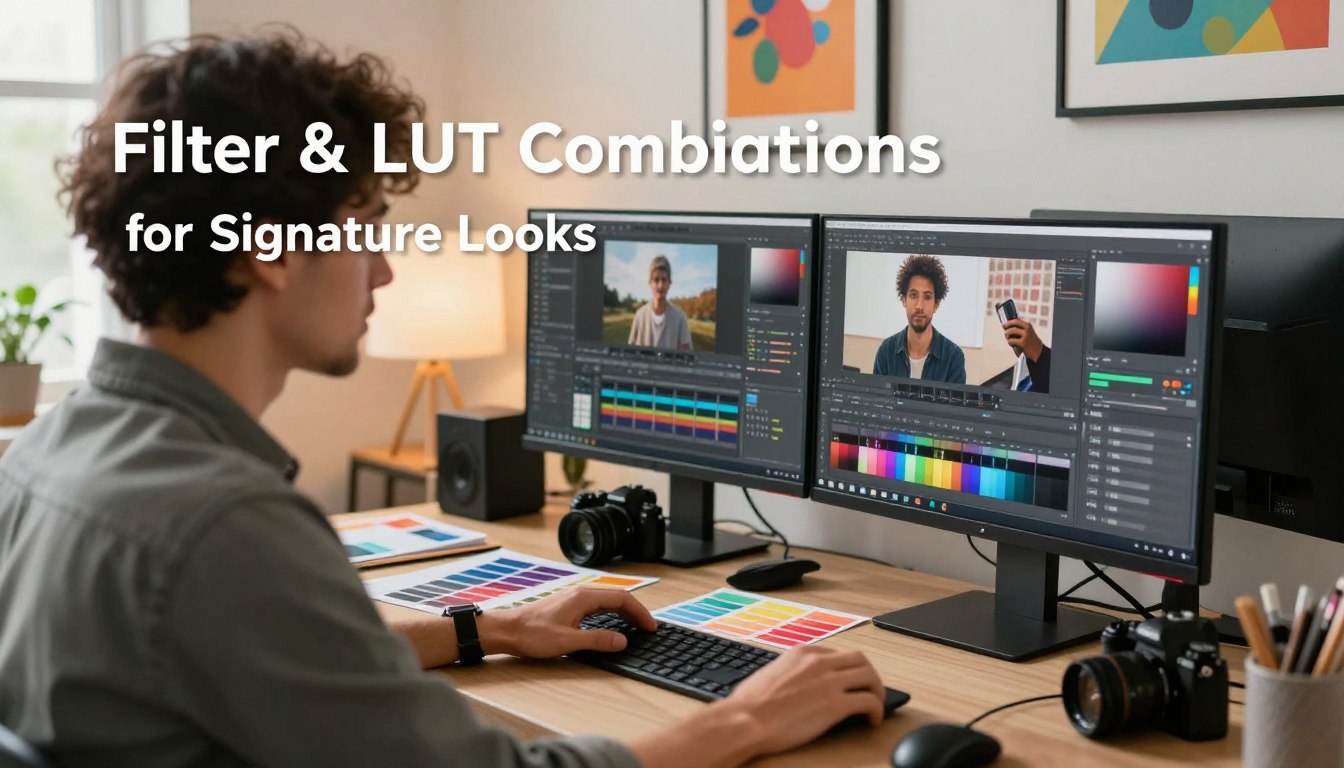
Ever wondered why some creators have a distinctive visual style that stands out? The answer often lies in combining color grading tools with their creative vision. By using the right ai porn pmv filters, you can turn raw footage into a polished masterpiece. This will grab your audience’s attention from the start.
Creating a unique look isn’t about using random presets. It’s about carefully choosing Look-Up Tables (LUTs) and making specific adjustments. This way, you can align your technical skills with your creative vision. This approach boosts your production quality and helps you build a signature brand identity that connects with your viewers.
Key Takeaways
- Understand the foundational role of color grading in establishing a unique visual identity.
- Learn how to combine LUTs and digital tools to create a professional, cinematic finish.
- Discover techniques to ensure your content remains consistent across different projects.
- Explore how strategic adjustments can enhance the emotional impact of your video work.
- Master the balance between technical precision and creative artistic expression.
Understanding the Role of Color Science in Video Editing
Color science is the hidden foundation of every top-notch video project. Mastering these technical rules lets you control the mood and story of your content. This skill helps you go beyond basic editing and create a professional look.
The Fundamentals of Color Grading vs. Color Correction
Many editors mix up correction and grading, but they’re different. Color correction fixes issues like exposure and white balance. It makes sure your footage looks natural and consistent.
After fixing the technical issues, you enter the creative phase of color grading. Here, you add styles to evoke emotions. You can use tools like adjusting color wheels and applying pmv filters to change the color palette.
- Adjusting color wheels for specific highlights and shadows.
- Applying specialized pmv filters to shift the overall color palette.
- Using curves to manipulate luminance and saturation levels.
How LUTs Interact with Raw Footage
Raw footage is like a blank canvas for your vision. Applying a Look-Up Table (LUT) maps colors to a new space. This process depends on the color science of your camera.
If your footage is in a flat profile, it’s full of data for grading. A good LUT brings back contrast and color depth. Adding pmv filters can make your video look cinematic and polished.
The Impact of Color Science on Viewer Engagement
Colors affect viewers on a subconscious level. Consistent color science keeps them immersed. It prevents jarring changes that might pull them out of your story.
Think of color as a mood language that speaks before words do. A cohesive look builds trust and keeps viewers engaged. Proper color management is key to your creative identity.
Selecting the Right ai porn pmv filters for Your Project
Choosing the right ai porn pmv filters is all about finding the right mix of tech and creativity. Before you start, think about how your choice will change the story. The right look can turn a simple clip into something amazing.
Identifying the Aesthetic Goals of Your PMV
Every project has its own mood. You need to decide on this mood early on. Do you want a bold, movie-like feel or something softer and dreamy? Your pmv filters set the tone for this mood. Think about what you want to make your viewers feel.
“Color is a power which directly influences the soul.”
Evaluating AI-Driven Filter Capabilities
Today’s tech offers tools that make grading easier. When checking out ai porn pmv filters, look for ones that let you fine-tune light and dark areas. You want tools that make your video look better without adding unwanted digital stuff.
| Filter Type | Best Use Case | Control Level |
|---|---|---|
| AI-Automated | Quick turnarounds | Low |
| Hybrid Presets | Balanced workflows | Medium |
| Manual LUTs | Professional grading | High |
Balancing Automated Filters with Manual Adjustments
Using only automation can make your video look too generic. The best editors start with pmv filters but then make their own tweaks. This ensures skin tones look natural and contrast is just right.
By mixing automated presets with your own touches, you get a polished and authentic look. This way, you keep your video looking great while saving time. Finding this balance is key to creating your own style.
Building Your Professional LUT Pack Library
Creating a top-notch collection of color assets boosts your creativity. A well-organized lut pack is key to a smooth post-production process. It lets you easily apply consistent looks to different types of footage.

Essential LUT Categories for Different Moods
Your library needs a variety of styles for different projects. You’ll want dramatic, high-contrast presets for intense stories and soft, vintage looks for a nostalgic vibe.
A versatile lut pack prepares you for any visual task. Organize them by mood, like “Moody Noir” or “Bright Commercial,” to save time during editing.
Technical Requirements for High-Quality LUTs
Quality is crucial when choosing assets. High-quality LUTs must be based on accurate color science to avoid artifacts or banding in shadows.
Always choose 3D LUTs over 1D for more precision. Make sure they work with your main editing software to keep your footage’s original quality.
Organizing Your Assets for Efficient Workflow
A messy folder structure slows you down. Organize your lut pack by category or project type for a clean, intuitive workspace.
Use a naming system that shows the asset’s use or color science profile, like “Log-to-Rec709.” Consistency in file management helps you find the right look quickly, keeping your creative flow uninterrupted.
Step-by-Step Guide to Layering Filters and LUTs
To create a unique look, layering digital assets is key. Mixing multiple effects adds depth that single adjustments can’t match. This method helps you craft a standout aesthetic.
Preparing Your Timeline for Color Processing
Before diving into effects, organize your workspace. Clean up your timeline by grouping clips and removing unnecessary transitions. This step prevents technical issues and ensures smooth processing.
Normalizing your footage is also crucial. Make sure white balance and exposure are consistent. A solid base helps your adjustments work well together without color issues.
Applying Base Filters for Initial Stylization
Start by applying base filters to your timeline. These initial steps set the mood and tone. High-quality ai porn pmv filters create a consistent look from the start.
Experiment with different base settings to find the right start for your story. Aim for a natural feel by adjusting the intensity. This base supports the layers you’ll add later.
Stacking LUTs to Achieve Depth and Texture
Next, add a lut pack to bring character and texture. Stacking these assets builds a rich, cinematic image. Use separate nodes or layers for full control.
When layering lut pack assets, focus on highlights and shadows. Adjust layer opacity for seamless blending. This technique creates an immersive experience that grabs your audience’s attention.
Advanced Techniques for Customizing Signature Looks
To improve your visual style, you need to go beyond basic presets. Start with a solid foundation, then make advanced adjustments. This ensures your project looks professional.
Adjusting Opacity and Blending Modes
When you use pmv filters, the effect might be too strong. Lowering the opacity of the adjustment layer can soften it. This makes the effect blend better with the original image.
Try different blending modes for more creativity. Modes like Overlay or Soft Light add depth without losing details. Adjusting these settings keeps your material looking great while adding a unique touch.
| Blending Mode | Primary Effect | Best Use Case |
|---|---|---|
| Overlay | Increases contrast | Adding punch to flat footage |
| Soft Light | Subtle enhancement | Natural skin tone preservation |
| Multiply | Darkens colors | Creating moody, cinematic shadows |
Masking Specific Areas for Targeted Color Grading
Color grading isn’t just about a global look. Sometimes, you need to focus on specific areas. Masks help you apply your grade where it’s most needed.
Use masks to keep a subject’s skin tones accurate while the background gets a unique color. This targeted approach keeps your look balanced. Precision in masking shows you’re a pro.
Creating Consistent Looks Across Multiple Clips
Keeping a consistent look in a long project can be tough. Use adjustment layers to apply your pmv filters across the timeline. This ensures all clips have the same color profile.
If a clip needs extra work, nest your sequences or use secondary color correction tools. Following solid color science principles makes your project feel unified. Consistency keeps your audience engaged.
Optimizing Performance When Using Resource-Heavy Filters
Creating a professional look means finding a balance between creativity and what your computer can do. Using complex visual effects can slow down your computer. Efficient resource management helps keep your editing sessions smooth.
Managing Hardware Resources During Rendering
Your GPU and CPU work together to handle ai porn pmv filters. Make sure your editing software uses hardware acceleration. Also, close apps that use a lot of RAM to free up resources for your project.

It’s important to watch your system temperatures during long export tasks. If your hardware gets too hot, break your project into smaller parts. This strategic approach helps avoid crashes and errors.
Using Proxy Files for Smoother Editing
Editing with high-resolution footage and ai porn pmv filters can cause lag. Proxy files are smaller versions that make editing faster. They let you move through your timeline smoothly.
After you’ve added color grading and effects, your software will switch back to the original files. This keeps your editing experience fluid and ensures your final product looks great. It’s a key practice for professionals.
Best Practices for Exporting Final Projects
When exporting, choose settings that balance quality and file size. High-bitrate exports are good for keeping files but might be too big for web streaming. Always check that your codec works with the platforms you plan to use.
Do a test render of a short clip before exporting the whole thing. This helps spot any issues with ai porn pmv filters or encoding early. Taking these steps ensures your final project looks perfect on any device.
Common Mistakes to Avoid When Combining Effects
Getting a professional look is more than just using a top-notch lut pack on your timeline. It’s tempting to add many adjustments for a unique look. But, this often hurts the quality of your work. Knowing your digital limits is key to keeping your work high quality.
Preventing Clipping and Banding Issues
Pushing your exposure or contrast too hard can lose important details. This is called clipping, leading to flat, unchangeable areas. Also, too much grading can cause banding, where smooth areas become blocky.
To avoid these problems, watch your scopes while adjusting your color science. If your waveform hits the limits, reduce your intensity. Using 10-bit footage gives you more room for detailed adjustments.
Avoiding Over-Saturation and Contrast Fatigue
Contrast fatigue happens when a video is too extreme, making eyes tired quickly. High contrast can be dramatic but hides details. Over-saturation makes colors bleed, taking away from your story.
To keep your video balanced:
- Use a subtle approach when layering effects.
- Check your saturation against a neutral monitor.
- Apply a slight fade to your final grade.
Maintaining Skin Tone Accuracy in Stylized Videos
One big mistake in creative grading is unnatural skin tones. Even with a special lut pack, human skin should be a priority. If skin looks green, orange, or magenta, your video loses credibility.
Always correct colors first, then add style. Use a vector scope to check skin tones. Isolate skin tones with a mask to change the background without harming your subjects.
Testing and Refining Your Signature Style
Creating a signature look is a journey, not a one-time thing. You should see your color grading as a project that grows with you. By being open to feedback, you can turn your raw footage into something polished and professional.
Gathering Feedback on Your Color Grading
To get better, you need to see things from other people’s viewpoints. Share your work in editing communities or on social media. Look for feedback on color balance, skin tones, and mood.
Try A/B testing too. Show two versions of a clip to a small group. This helps you see which pmv filters get the best reaction. This feedback is key to knowing what your viewers like.
Iterative Improvements Based on Viewer Response
After getting feedback, look for patterns. If people say your shadows are too dark or highlights too bright, adjust your settings. Small changes can make a big difference.
Play with blending modes and opacity levels. Your goal is to make your pmv filters look natural and consistent. This cycle keeps your style fresh and engaging.
Documenting Your Preset Combinations for Future Use
Being consistent is key for a professional editor. Keep a log of your best pmv filters and LUT stacks. This way, you can easily recreate your look later.
| Feedback Method | Primary Benefit | Implementation Effort |
|---|---|---|
| Community Forums | Diverse perspectives | Low |
| A/B Testing | Data-driven results | Medium |
| Peer Reviews | Technical accuracy | High |
By documenting your workflow, you save time later. You won’t have to guess which settings worked. This organized way is how you build a recognizable and reliable signature style.
Conclusion
Creating a signature look needs both technical skill and artistic vision. You now know how to use color science and layer effects for professional results. Your skill in using these tools will show in your future video projects.
Being consistent is key to building a recognizable brand online. Every lut pack you use adds to your unique style. By trying new things, you can grow creatively while keeping your work high-quality.
Keep track of your favorite lut pack combinations for quick use during busy times. A well-organized lut pack library saves time and keeps your look consistent. Your audience will see the professional touch in your color grading.
Keep trying new things and listen to feedback on your work. Growth comes from using these tips in real editing projects. Start building your signature look today and see your content’s visual impact soar.
FAQ
What is the primary difference between color grading and color correction in professional video editing?
Color correction makes sure your footage looks natural and consistent. Color grading adds a creative touch to evoke a mood. Using a lut pack, you can change a corrected image into a unique “signature look” for your brand.
How do AI-driven pmv filters enhance the visual appeal of music videos?
AI pmv filters analyze your clips to add style automatically. This used to need manual editing. They work with your color settings to make your videos exciting and engaging for YouTube or Vimeo.
Can I combine multiple LUTs from a single lut pack on one clip?
Yes, you can layer them, but be careful with intensity. Use adjustment layers in Adobe Premiere Pro or nodes in DaVinci Resolve to control each layer’s opacity. This prevents highlights from getting clipped and keeps your filters from overpowering your footage.
Why is color science important when working with high-dynamic-range (HDR) footage?
Color science is key to mapping HDR data correctly to your display. Without it, lut packs can cause unnatural color shifts or lose detail in shadows. This makes your filters look amateurish instead of cinematic.
What are the best practices for maintaining skin tone accuracy while using stylized pmv filters?
Use the “HSL Qualifier” tool to isolate skin tones before applying your lut pack. This way, you can apply bold filters to the background while keeping people’s skin tones realistic.
How can I optimize my computer’s performance when using resource-heavy filters and a large lut pack?
Resource-heavy filters and lut packs can strain your GPU. To keep editing smooth, create Proxy Files in Apple Final Cut Pro or Adobe Premiere Pro. This lets you edit with lower-quality files while the final render uses the full quality of your lut pack and effects.
What technical requirements should I look for in a high-quality lut pack?
A good lut pack should have 33x33x33 or 65x65x65 grid points (CUBE files). Higher grid density means more precise color changes. This is important for avoiding “banding” artifacts and ensuring smooth gradients.
How do I save my custom filter and LUT combinations for future projects?
Once you’ve perfected a look, export your settings as a custom PowerGrade in DaVinci Resolve or a Look file in Adobe Premiere Pro. This way, you can keep your visual style consistent across all your videos, making your signature color science instantly recognizable.